Eclipse CVS client
Updated 06 Nov 2004
- QuArK Information Base
- 4. The Source Code
- 4.1. The CVS repository at Sou...
|
|
Eclipse CVS client
Updated 06 Nov 2004
|
Upper levels: - QuArK Information Base - 4. The Source Code - 4.1. The CVS repository at Sou... |
|
4.1.1. Eclipse CVS client |
[ - - ] |
This is Rowdy's guide to configuring Eclipse to access the QuArK CVS repository. |
|
Index |
|
Program Links |
Rowdy / cdunde - 06 Nov 2004 | [ Top ] |
|
First, you will need to download and install Java 2 Platform (http://java.sun.com/j2se/1.4.2/download.html). You will only need the Runtime Environment version rather than the full SDK version. This program basically installs itself , so no configuration instructions are really needed here. Then download and install Eclipse (http://www.eclipse.org/downloads/index.php). You only need one file, for Eclipse 3.0 this would be eclipse-SDK-3.0-win32.zip. It is a zip file so you need a utility like WinZip. The default and generally recommended directory to extract it to is c:\eclipse. |
|
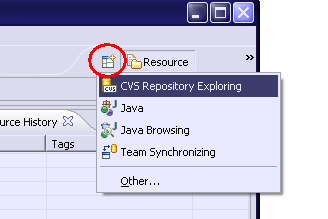
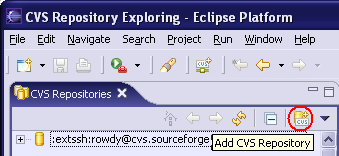
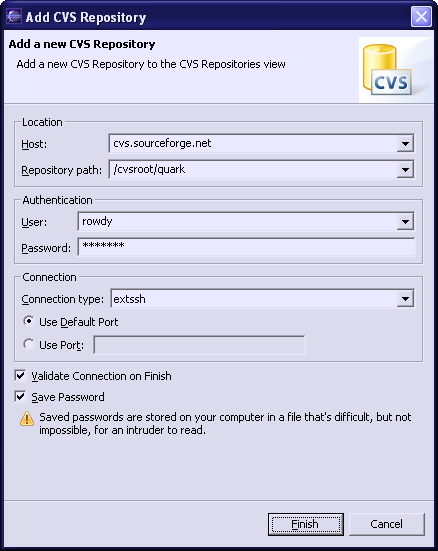
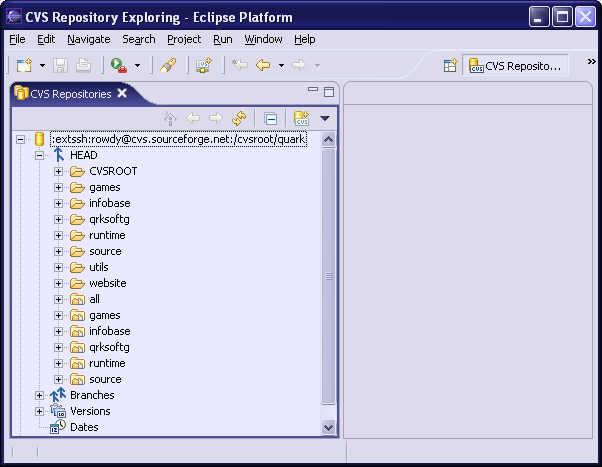
Installation & Configuration |
Rowdy / cdunde - 06 Nov 2004 | [ Top ] |
|
|
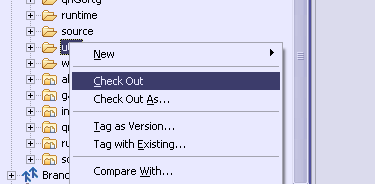
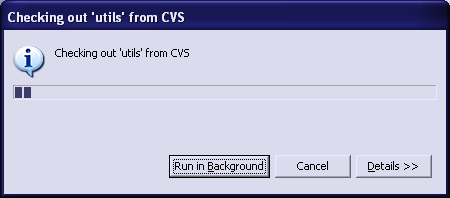
Downloading Files |
Rowdy / cdunde - 06 Nov 2004 | [ Top ] |
|
|
Uploading Files |
Rowdy / cdunde - 06 Nov 2004 | [ Top ] |
General Comments: If this information is of use, and a positive response is received about using Eclipse to access the QuArK source, Rowdy will probably expand on this with a few more examples, and hints on using Eclipse. |
|
GNU General Public License by The QuArK (Quake Army Knife) Community - http://www.planetquake.com/quark |
[ - Top - ] |